
Approaching Swift Concurrency
Marcin Hawro
December 06, 2023
This article was written down in the Swift 5.9 and Xcode 15 era.
Swift Concurrency debuted in the WWDC 2021 with the Swift 5.5. Initially, the functionality was constrained to the iOS 15+. But then Doug from the Swift Language Steering Group backported it to iOS 13: https://github.com/apple/swift/pull/39342/files. Years passed, and the OS restrictions became less of a problem. Apple has put some effort into adopting the new concurrency in their libraries. Be careful, though, because they are not 100% ready yet. Anyway, the stability and maturity improved, and the Swift Concurrency gradually became available for more and more projects. In this article, I would like to explore a few ways that make the shift from the traditional way of doing concurrency a little bit less painful.
Step 1. Have a specific problem.
Concurrency is hard. Unfamiliar concurrency is even more challenging. Don’t just drop some operations onto the background threads for the respect points or giggles. Think about the other developers who will read and maintain your code. Even if you have a side project just for yourself, the Future You will be reasoning about the code. Leaving the complicated system difficult to debug, extend, reuse, or refactor will upset any potential reader and discourage further tries. Your best bet is to avoid concurrency altogether. That’s a skill in itself! If only you could work around your problem using just a single thread, by all means, go for it. Chances are you will be glad you did.
But sometimes, the problem is so heavy that no single-threading spell does the job. I have the macOS application that periodically executes some git operations. If you’ve ever worked with a git repository, you’ve most likely noticed that git status or git checkout could take a few seconds to complete. Doing that on the main thread in the macOS ecosystem results in the spinning beachball of death. Throwing the ball in people’s faces is often considered rude, so leaving that problem for the main thread was not an option for me.
So invest in this concurrency thing only if you genuinely have to. If you do, there is one more educational benefit worth mentioning. Knowledge retention is much better when applying new techniques in real life. Also, the Swift Concurrency spans across multiple complex topics. The concrete problem will help you prioritize the knowledge best suited to your situation.
Step 2. Enable diagnostics.
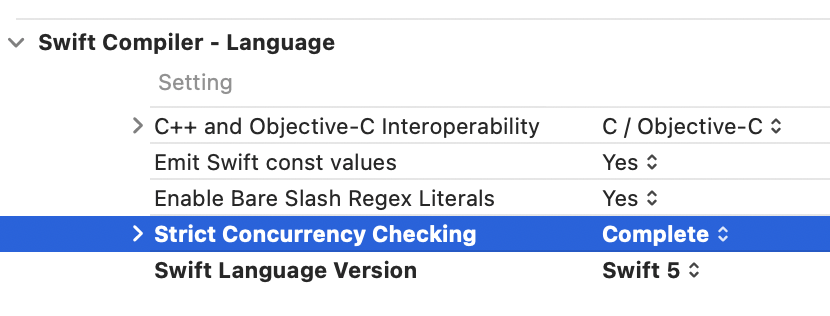
Swift Concurrency is an ongoing initiative. Only some things are fully ready. Asynchronous code that works in the latest Swift release (5.9 at the moment) may not work in version 6. To ensure your code passes even the most rigorous set of rules, enable complete Strict Concurrency Checking in the Build Settings of the app target:
You can also do it for the standalone Swift package in the Package.swift manifest file. Assuming you can use Swift tools, at least on version 5.8.
// swift-tools-version: 5.9

import PackageDescription

let package = Package(
    name: "AsyncUtilities",
    products: [ ... ],
    targets: [
        .target(
            name: "AsyncUtilities",
            swiftSettings: [.enableExperimentalFeature("StrictConcurrency=complete")])
    ]
)
It checks if the types that cross between the different threads are okay to do that (more on that below). It also verifies that the actor types are called only from the isolated contexts as they should.
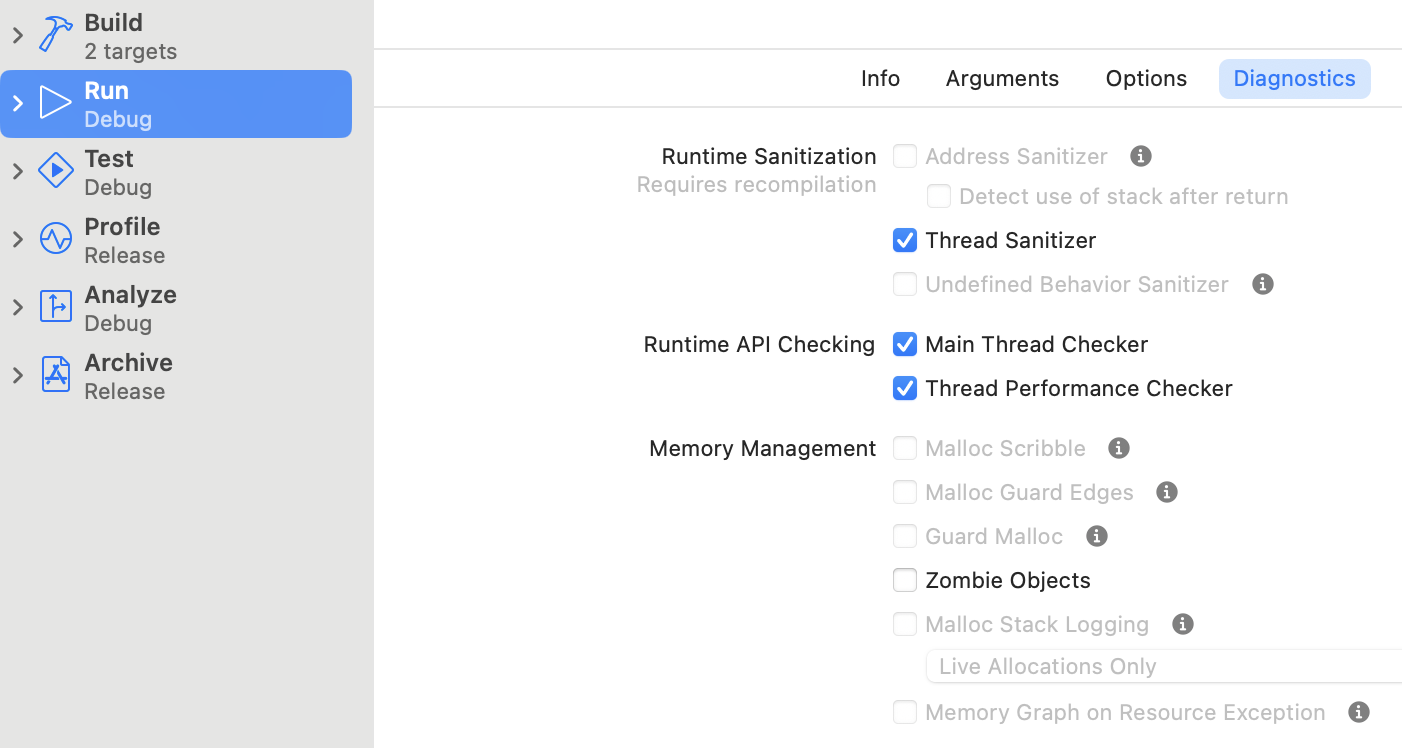
The second diagnostic tool that can assist you is Thread Sanitizer. It helps detect data races - multiple unsynchronized reads and writes to the shared resource from the different threads. You can find it in the target scheme settings (CMD+<), Run action, Diagnostics tab:
The most significant benefit of these diagnostics is that they will help you learn Swift Concurrency for current and future use. You will get a deeper understanding and awareness of where the risks and the pain points are. The tools will force you to notice things that you would otherwise miss.
Step 3. Be mindful of objects that jump between the threads.
Let’s consider the code implemented using the traditional GCD model:
private let backgroundQueue = DispatchQueue(label: "com.example", qos: .background)

private func oldThreadsCrossingWithoutSendableCheck() {
    backgroundQueue.async {
        // hello from the background thread
        let ultraHeavyResult = self.ultraHeavyRenderingOperation()

        DispatchQueue.main.async {
            // hello from the main thread
            self.animate(result: ultraHeavyResult)
        }
    }
}
We can notice that the mysterious ultraHeavyResult and enigmatic self cross freely between the background and main threads. There is no border control, security check, or detector canine. Objects could smuggle weapons or exotic animals (also stuffed), and the compiler or other diagnostics would not care. As a result, the developer could only bother about these things once something starts crashing.
The situation is different with the strict checking:

We can see that the compiler issues some warnings against the types that cross the different concurrency domains. (By the way, Strict Concurrency Checking works for new Swift Concurrency and older GCD/NSOperation code!) Indeed, the border control does operate, and the travelers need either a Sendable passport or @unchecked Sendable diplomatic immunity.
The Sendable is a unique protocol that doesn’t require methods or properties but has semantic requirements. Fulfilling these requirements makes the type thread-safe. Sendable’s documentation gives the best explanation.
@unchecked Sendable is a promise that the declared type is thread-safe. It bypasses the compiler check. When designing your types, prefer the Sendable conformance first unless impossible. @unchecked Sendable is helpful for the following two scenarios:
1) to mark native system types, which “should” be thread-safe, but Apple hasn’t conformed them to Sendable. I once had to send a UserDefaults object to the background utility task, so I did something like this:
extension UserDefaults: @unchecked Sendable { }
2) to mark thread-safe type that cannot be marked Sendable. An example here could be a perfectly thread-safe class that you cannot, for some reason, make final. Even more common is an unfortunate case in which a single var of non-sendable type ruins the Sendable conformance for your final class. Even if you have a perfect locking mechanism and everything works as expected, you still need @unchecked Sendable.
There is also a third hidden use case, which you should never do but which you should know about. Sendable is a thread safety promise. And as with every promise, it can be broken. Nothing prevents you from marking the type as @unchecked Sendable when this type is not thread-safe and should never be called as such! This is especially tempting for the big types with lots of mutable states. Adding the fake @unchecked Sendable tells Strict Concurrency Checking to let you off the hook. It’s a mechanism that sits next to the disabling warning or Swiftlint check. Do not fall for this dark side of the thread safety. In the unfamiliar code, develop the habit of checking if the author used the @unchecked Sendable correctly.
Step 4. Identify resources that should be protected.
The typical situation in the multithreading code is the existence of a resource that should be accessed by only one thread at a time. One such resource in my macOS app with the git operations was the url to the git repository folder. Each git command requires that url. Meanwhile, the user could always change this url to the new repo. I wanted to protect the url, so the write and read access is exclusive to one thread at a time (atomic). I eventually put the url variable in an actor, which gave me what I needed.
If you’ve already found the types that traverse the threads, you will find it equally helpful to pinpoint the objects that should have protected access. It’s usually okay to allow multiple simultaneous reads. But if the shared resource mutates itself or another resource, it’s a good and safe practice to protect it from concurrent use. In the new reality, we have two options: actors and manual locking, typically with a lock or serial queue. There are essential performance distinctions between both possibilities which you should research. But in this article, I would like to give an additional practical hint for picking the right one for you.
It’s possible to call actor methods only from the asynchronous contexts. You must call them from another async method or inside Task { // here }. This option might not be the best for the types also used in non-asynchronous code. An example could be a type that monitors network connection. Most likely, there are places where it’s just most practical to check isOnline in a regular main thread code. In such a case, an actor would probably annoy many people. Furthermore, if you have a large codebase, be prepared that the transition into an actor may trigger an avalanche of required changes in the places where the instances of actor type are called.
Step 5. Keep the types that participate in concurrency as small as possible.
Imagine some heavy processing async operation - a perfect candidate for the background thread. This operation happens to be a part of the business logic layer, so it sits in the view model, interactor, or in the other place for the business logic. We quickly fire a task:
func dispatchUltraHeavyProcessing() {
    Task(priority: .low) {
        await ultraHeavyProcessing()
    }
}
Easy enough, everything seems fine. That is until we enable diagnostics and realize what crosses the concurrency boundaries. Oh no! That would be self!
Task(priority: .low) {
    await self.ultraHeavyProcessing()
}
Now, our business logic type needs to be thread-safe. Suddenly, we might find ourselves in a massive view model. One that has an enormous number of mutable states which could take ages to properly protect. Because the current sprint finishes today (Narrator: the sprint finished yesterday.), we mark the whole class with @MainActor and create a tech ticket for later. Fine, maybe we ended up with the massive scope that doesn’t necessarily need to be on Main Actor, but at least we scored some points for “konkurensy”.
The example above illustrates how careful we need to be with the size of the types that participate in concurrency. We wouldn’t have a problem with a small value type or one with no state. Locking one or two variables is more appealing than having nine or ten vars. The Single Responsibility Principle shines in this area. Remember, the smaller and more specialized types, the easier to work with them in a multithreading environment.
Summary
Hopefully, you have a task that is a good fit for the background execution. Attempts to work it out on the main thread have already failed. Think of what parts of this task would be passed between the threads. Think about resources that should be protected and whether the actor or manual lock would make more sense. Are all interested types small and manageable enough? Enable diagnostics and do the magic. You got this!
Additional resources
Your specific problem will dictate which resource is most useful for you. I found the WWDC 2021 “Swift concurrency: Update a sample app” video most universally applicable. This session may be a good investment if you have one spare hour.
Video: https://developer.apple.com/videos/play/wwdc2021/10194.
Sample Code: https://developer.apple.com/documentation/swift/updating_an_app_to_use_swift_concurrency.
The video about actors is critical if you have a problem that requires using them: https://developer.apple.com/videos/play/wwdc2021/10133
Finally, you should also read the documentation of the Sendable: https://developer.apple.com/documentation/swift/sendable.


